Imagine a dessert that perfectly captures the essence of summer with its bright, tangy, and refreshing flavors.
This Key Lime Pie recipe is an homage to the tropical breezes and sun-drenched beaches of Florida.
With its creamy filling, crumbly crust, and sweet-tart balance, it’s a treat that’s as comforting as it is indulgent.
I first fell in love with this pie during a family vacation to the Florida Keys, where every bite was like a splash of sunshine.
Whether you’re hosting a backyard barbecue or looking for a sweet end to a dinner party, this Key Lime Pie promises to impress with its simplicity and elegance.
The History and Cultural Significance
• Key Lime Pie traces its origins to the late 19th century in the Florida Keys, where it was originally created by local residents using simple, readily available ingredients.
• The dish evolved over decades as refrigeration became common, allowing for the use of fresh eggs and dairy, eventually becoming the beloved version we know today.
• In Floridian culture, this dish traditionally appears at family gatherings and summer celebrations, symbolizing the laid-back lifestyle of the Keys.
• While many variations exist across different regions, the authentic version maintains the use of Key limes and condensed milk, which sets it apart from imitations.
Recommended Products

Made with real key west lime juice

Baking Essential:10-inch deep glass round pan is a must-have for baking enthusiasts; Whether you're whipping up cakes, cookies, or bread, this clear pie dish can withstand high temperatures without cracking or warping, ensuring perfect results every time

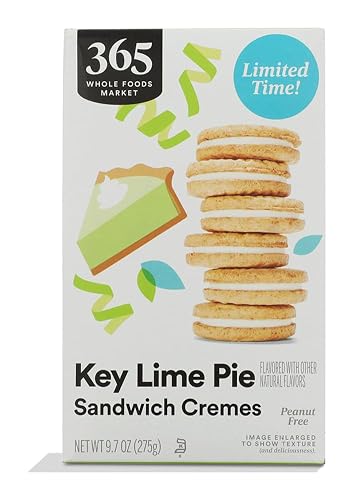
Marie Callender's Key Lime Pie is the perfect comfort food after a long day

Recipe Overview
Recommended Products

ZEST CITRUS: The blade is designed with a specific tooth set that takes the flavorful rind directly off the citrus fruit, while leaving behind the bitter white pith. Zest adds flavor to vinaigrettes, stir fries, salads, and baked goods! Change your life, with a little zest!

Zest Citrus: The blade is designed with a specific tooth set that takes the flavorful rind directly off the citrus fruit, while leaving behind the bitter white pith. Zest adds flavor to vinaigrettes, stir fries, salads, and baked goods! Change your life, with a little zest!

Ultra sharp Made in USA blades: Microplate uses Photo-Etched technology to make Ultra sharp grating blades right here in America!
Nutritional Information (per serving)
Recommended Products

NO MORE LOST BEATERS: The snap-on storage case that comes with the Hamilton Beach hand mixer neatly holds the 2 beaters and whisk in one easy-to-find place, reducing the chance that the attachments are lost or misplaced.

SELF-CONTROL SPEED – Features 5 adjustable speeds, ranging from 1 (Lowest) to 5 (Highest), allowing you to choose the ideal mixing speed for perfectly customizable texture and consistency in any recipe. Perfect for whipping cream, making butter, beating egg whites and batter, or preparing mashed potatoes and other dishes.

EASY CLEAN BEATERS REDUCE CLOGGING AND PROVIDE GREAT MIXING PERFORMANCE. Their smooth, innovative design glides through ingredients to reduce clogging, saving you time and aggravation every time you mix.
Essential Equipment Guide
9-inch Pie Pan: A quality pie pan is essential for achieving the right crust texture. Glass or ceramic pans are ideal as they distribute heat evenly, preventing soggy bottoms. Look for one with a wide rim for easy handling.
Microplane Zester: This tool is crucial for zesting limes to achieve a burst of fresh citrus flavor. A fine grater can also work, but a microplane provides the best control and efficiency. Choose one with a comfortable grip to make zesting easy.
Electric Mixer: An electric mixer, either hand-held or stand, is important for whipping the filling to a smooth, creamy consistency. If unavailable, a whisk will suffice, but it requires more effort. Opt for mixers with multiple speed settings for versatility.
Recommended Products

1.5 lbs Packaged in sealed / resealable Bag.

Twelve 9-inch Keebler Ready Crust Graham Cracker Pie Crusts

One 6 ounce ready-to-eat Graham Cracker Pie Crust


Ingredients
Recommended Products


EAGLE BRAND SWEETENED CONDENSED CANNED MILK: 14 ounces of rich and creamy sweetness used best for baking, cooking, beverages, dessert and more.
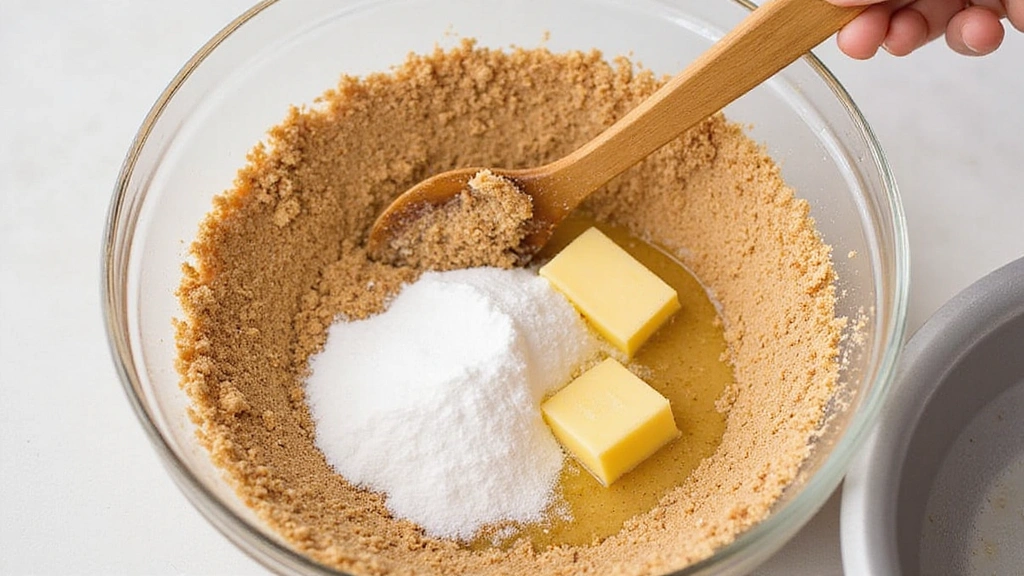
For the Crust
|
| Amount | Ingredient | Notes |
|---|---|---|
| 1.5 cups | graham cracker crumbs | provides a sweet, crunchy base |
| 0.5 cup | unsalted butter | melted, binds the crust |
| 2 tablespoons | sugar | adds sweetness |
For the Filling
| Amount | Ingredient | Notes |
|---|---|---|
| 1 cup | Key lime juice | freshly squeezed for authentic flavor |
| 1 tablespoon | Key lime zest | adds aromatic citrus notes |
| 3 large | egg yolks | thickens the filling |
| 1 can (14 ounces) | sweetened condensed milk | creamy texture and sweetness |
Preparation Methods
Blind Baking: Blind baking involves pre-baking the pie crust before adding the filling. It ensures the crust is fully cooked and prevents it from becoming soggy. To master this technique, use pie weights or dried beans to keep the crust flat, and bake until lightly golden.
Zesting: Proper zesting releases oils from citrus peels, adding intense flavor to dishes. Use a microplane zester to gently scrape the surface of the lime, avoiding the bitter white pith beneath. Rotate the lime as you zest for even coverage.
Whipping: Whipping the filling incorporates air, resulting in a light, creamy texture. Start on low speed to combine ingredients, then increase to medium-high until the mixture thickens. Look for a smooth, velvety consistency to avoid over-whipping.
Recommended Products

Durable Glass Construction: Made from Pyrex glass for durability and heat resistance.

INCLUDES: This bakeware set contains (1) 9-inch glass pie plate. perfect for your everyday needs.


Step 1: Prepare the Crust
Preheat your oven to 350°F (175°C).
In a bowl, combine graham cracker crumbs, sugar, and melted butter.
Mix until the crumbs are fully moistened, resembling wet sand.
Press the mixture firmly into the bottom and sides of a 9-inch pie pan.
Recommended Products

Ultra Sharp Made in USA blades: Microplane uses photo-etched technology to make ultra sharp grating blades right here in America! BPA free plastic handle.

BEST FOR - Lemon, Lime, Citrus, Ginger, Garlic, Whole Cinnamon, Whole Nutmeg, Hard Cheese like Asiago or Parmesan. Adds flavor, without any texture.

FLEXIBLE TOP: The made in USA zesting blade is surrounded with BPA-free Silicone that flexes with pressure, allowing the zester to easily glide over the rinds of citrus fruit. This kitchen grater maximizes the amount of lemon zest you get in one stroke!


Step 2: Blind Bake the Crust
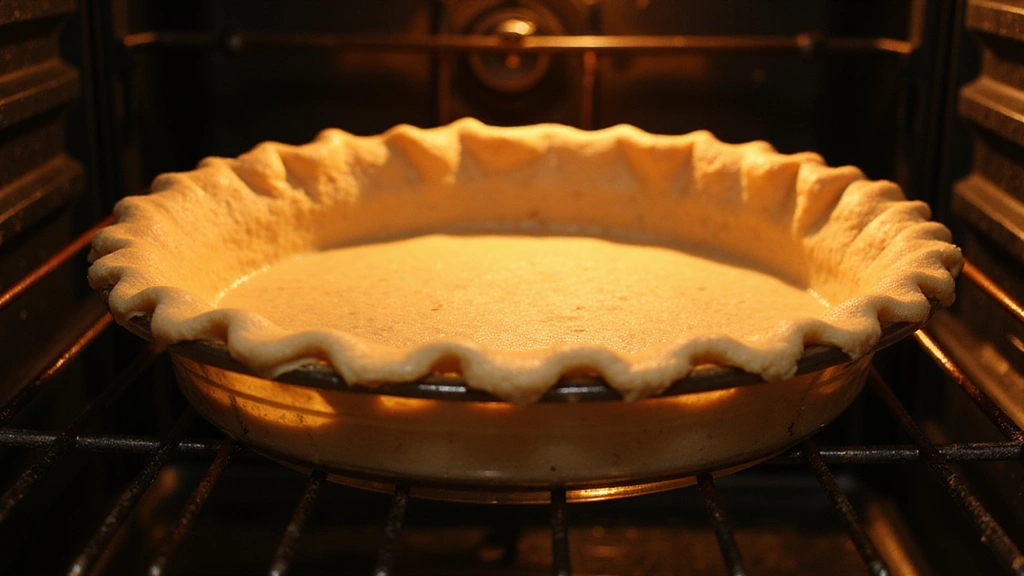
Place the crust in the preheated oven.
Bake for 10 minutes until lightly golden.
Remove from oven and let it cool slightly.
This step ensures a crisp crust that holds the filling well.
Recommended Products
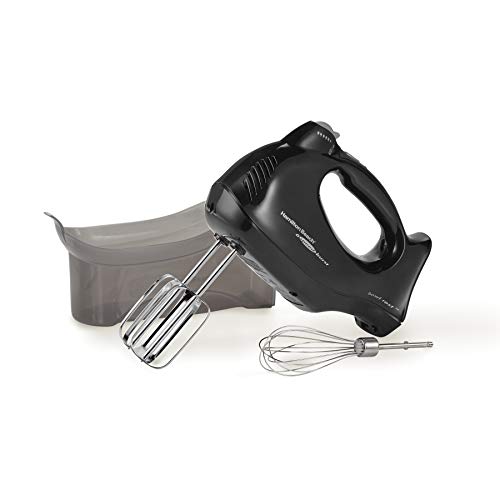
NO MORE LOST BEATERS: The snap-on storage case holds the included attachments, reducing the chance that beaters for the electric hand mixer get lost or misplaced. A convenient access door makes it easy to add attachments or remove them from the case

SELF-CONTROL SPEED – Features 5 adjustable speeds, ranging from 1 (Lowest) to 5 (Highest), allowing you to choose the ideal mixing speed for perfectly customizable texture and consistency in any recipe. Perfect for whipping cream, making butter, beating egg whites and batter, or preparing mashed potatoes and other dishes.

9-SPEED HAND MIXER: The Cuisinart Power Advantage PLUS 9-Speed Hand Mixer with 220-watt motor and automatic feedback features 9 speed options and a one-step power switch with LED display.

Step 3: Zest and Juice the Limes
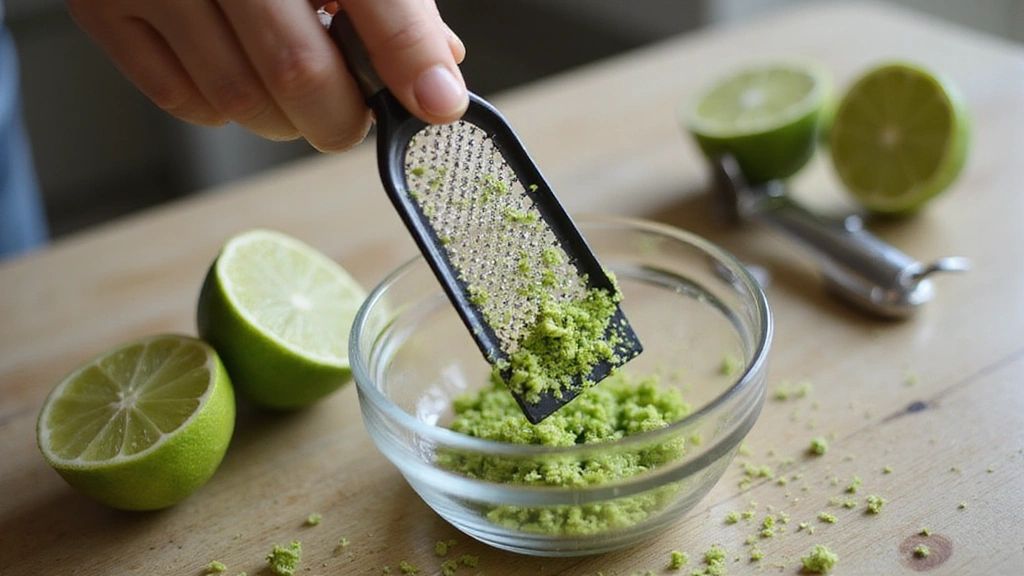
Zest the Key limes using a microplane, being careful to avoid the white pith.
Cut the limes in half and juice them until you have 1 cup of juice.
Strain the juice to remove any seeds or pulp.
The fresh juice and zest will provide the pie’s signature tangy flavor.
Recommended Products

GRAHAM CRACKER CRUMBS: The Bulk-Priced Food Shoppe’s graham cracker crumbs are great for high-yield baking. Our graham crumbs are made from high-quality, lightly sweetened graham crackers that are finely ground for the best possible flavor.

Use for cheesecake crust, pies shells, toppings, and garnish

Two 6 ounce graham cracker pie crusts


Step 4: Prepare the Filling
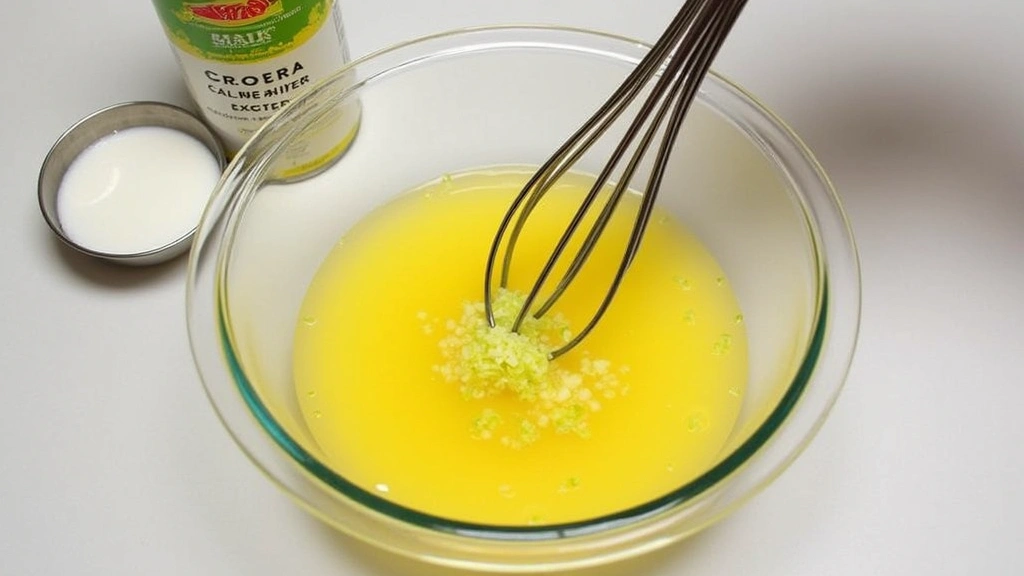
In a mixing bowl, combine egg yolks and lime zest.
Beat on medium speed until the mixture is pale and slightly thickened.
Add the sweetened condensed milk gradually, continuing to beat until smooth.
Finally, mix in the lime juice until fully incorporated.
Recommended Products


Includes two 2 lb. bags of Key Lime pie and pastry filling

100% REAL KEY LIME JUICE FROM FLORIDA - Check the competition's ingredients and find Persian Limes or Tahitian Limes


Step 5: Pour and Smooth the Filling
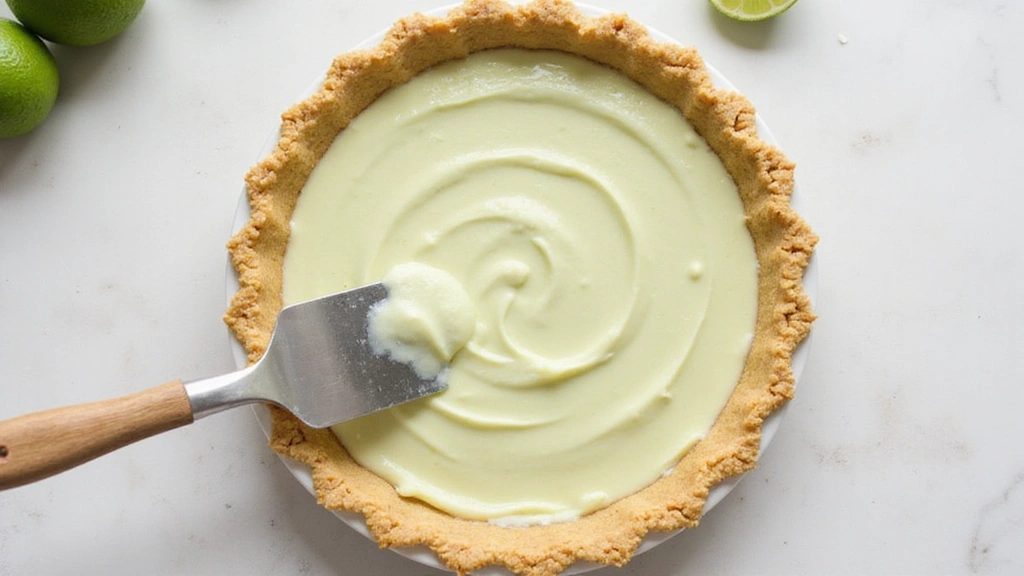
Pour the prepared filling into the cooled crust.
Use a spatula to spread the filling evenly.
Smooth the top for an even surface.
This ensures the pie bakes uniformly and looks attractive.


Step 6: Bake the Pie
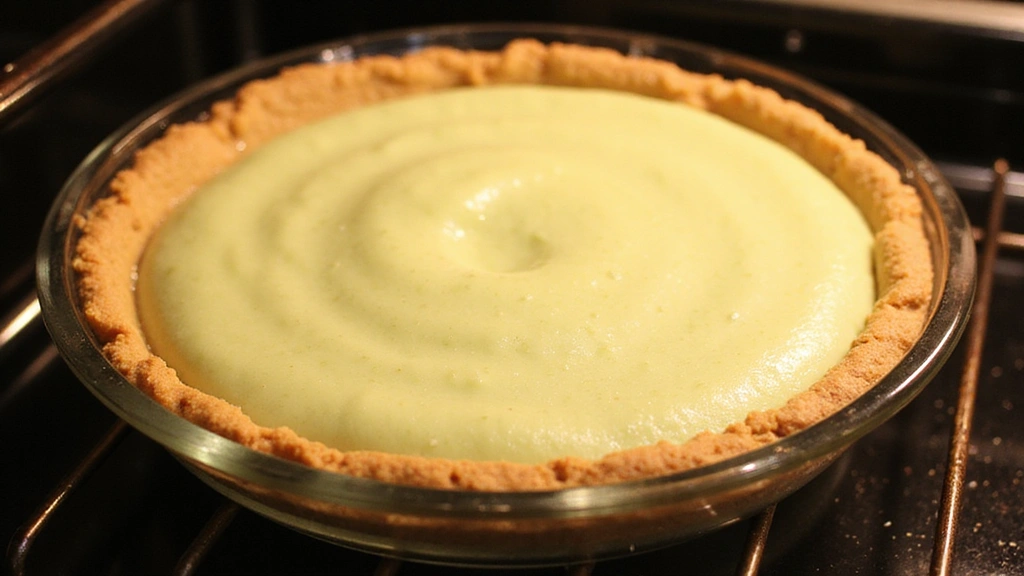
Place the pie in the oven at 350°F (175°C).
Bake for 15 minutes until the filling is set but still slightly jiggly in the center.
Remove from the oven and allow it to cool at room temperature.
This baking step sets the filling properly while retaining a creamy texture.


Step 7: Chill the Pie
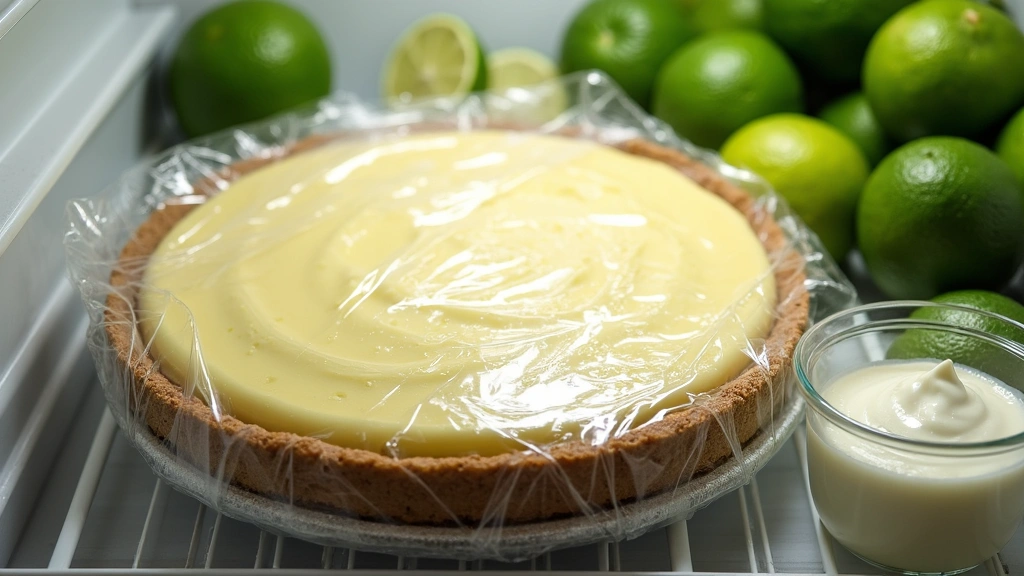
Once the pie has cooled to room temperature, transfer it to the refrigerator.
Chill for at least 2 hours or overnight for best results.
Chilling allows the filling to firm up to the perfect texture.
Ensure the pie is covered to prevent it from absorbing odors.
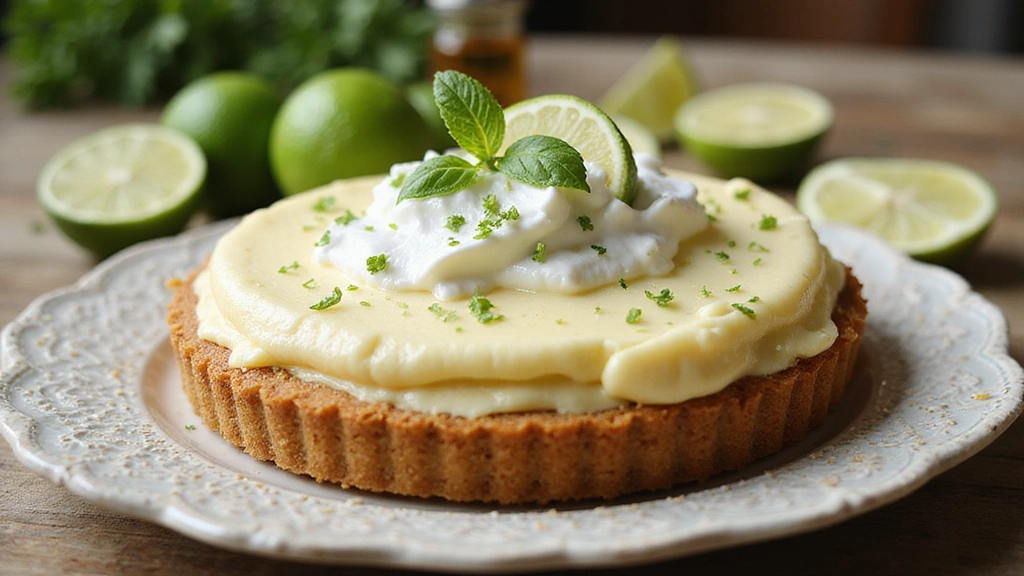
Step 8: Garnish and Serve
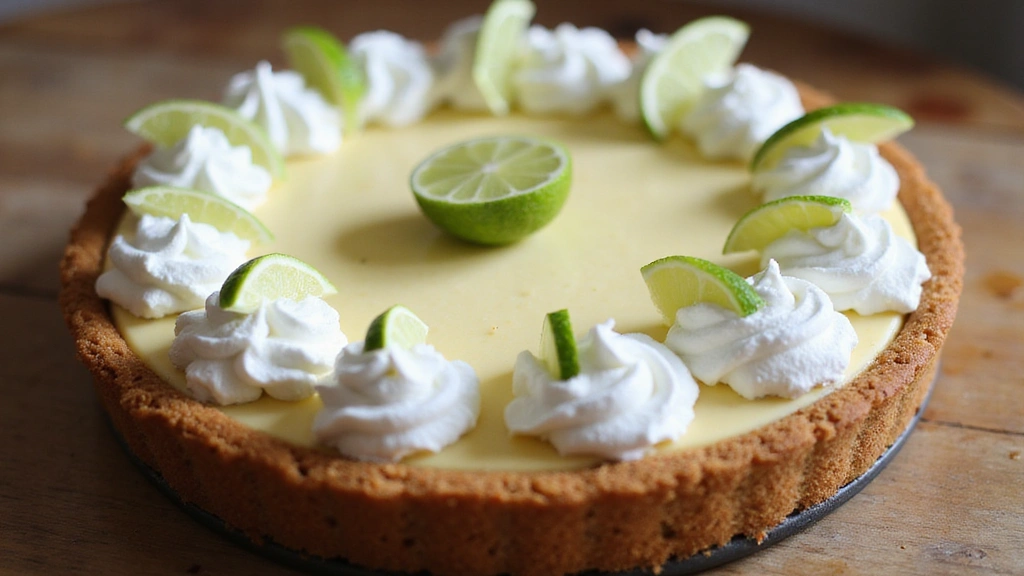
Before serving, whip some cream to soft peaks.
Pipe or dollop the whipped cream around the edges of the pie.
Add lime slices or zest for decoration.
These garnishes elevate the pie's appearance and complement its flavors.


Critical Timing and Temperature Guide
Baking the Crust: Bake at 350°F (175°C) for 10 minutes until golden. Avoid baking too long to prevent burning.
Setting the Filling: Bake at 350°F (175°C) for 15 minutes until just set with a slight jiggle. Overbaking can result in a dry texture.
Chilling: Chill for at least 2 hours. Ensure the pie is covered to avoid absorbing fridge odors.
Pro Tips for Key Lime Pie
• Ingredient Selection: Choose fresh Key limes for the best flavor. Their unique taste is essential for authentic pie.
• Preparation Secret: Let the pie crust cool completely before adding the filling to prevent sogginess.
• Temperature Management: Use room temperature ingredients for even mixing and optimal texture.
• Texture Enhancement: Beat the filling until thickened for a creamier consistency without overworking it.
• Flavor Layering: Use both lime juice and zest to enhance citrus notes and add depth.
• Make-Ahead Strategies: Prepare the crust and filling the day before serving, storing separately until assembly.
• Restaurant-Quality Finishing Touches: Garnish with freshly whipped cream and lime zest or slices for a professional look.
• Equipment Optimization: Ensure your mixer is at medium speed to incorporate air without overbeating.


Troubleshooting Common Issues
• Crust Too Soggy: Caused by not cooling the crust properly before filling. Ensure complete cooling to prevent this.
• Filling Not Setting: May occur if not baked long enough. Look for a slight jiggle and bake a bit longer if needed.
• Pie Too Tart: Use the correct amount of sugar and sweetened condensed milk to balance tartness.
• Overbaked Filling: Results in a dry texture. Bake until just set with a slight jiggle in the center.
• Cracked Filling: Caused by overbaking. Monitor closely and remove when just set.


Variations and Regional Differences
• Florida Style: Uses Key limes and a graham cracker crust, often topped with meringue instead of whipped cream.
• New York Variation: Incorporates cream cheese for a richer filling, resembling a cheesecake consistency.
• Californian Twist: Adds avocado to the filling for a creamy texture and subtle flavor change.
• Mexican Version: Uses Mexican limes and adds a hint of tequila for an extra kick.
Food Science Behind the Recipe
• Emulsification: The egg yolks and sweetened condensed milk create an emulsion, thickening the filling and providing a smooth texture.
• Acid's Role: The acid in lime juice helps set the filling when combined with the proteins in egg yolks, acting like a natural thickener.
• Maillard Reaction: Occurs in the crust during baking, resulting in a golden brown color and enhanced flavor.
Frequently Asked Questions
What's the most common mistake people make when preparing Key Lime Pie? Overbaking the filling is a common error. It should be set but still slightly jiggly to avoid a dry texture.
Can I use regular limes instead of Key limes? While possible, Key limes offer a distinct flavor that regular limes can't fully replicate.
How can I store leftover pie? Cover the pie tightly and store it in the refrigerator for up to 3 days.
Is it necessary to use a water bath? No, a water bath is not needed for Key Lime Pie; baking directly in the oven suffices.
Can I freeze Key Lime Pie? Yes, you can freeze it for up to a month. Thaw in the refrigerator before serving.
Why is my crust crumbling? Not enough butter or pressing too lightly can cause crumbling. Ensure a firm, even press when forming the crust.
Can I make this pie gluten-free? Yes, use gluten-free graham crackers in the crust for a gluten-free version.
What type of sugar is best for the crust? Granulated sugar works well, providing necessary sweetness and structure.
Serving and Presentation Guide
• Traditional Presentation: Serve chilled, garnished with whipped cream and lime slices on a wooden board for a rustic look.
• Elegant Plating: Serve on a dessert plate with a fork, adding a lime twist and mint sprig for sophistication.
• Casual Style: Offer sliced wedges on paper plates, ideal for summer gatherings.
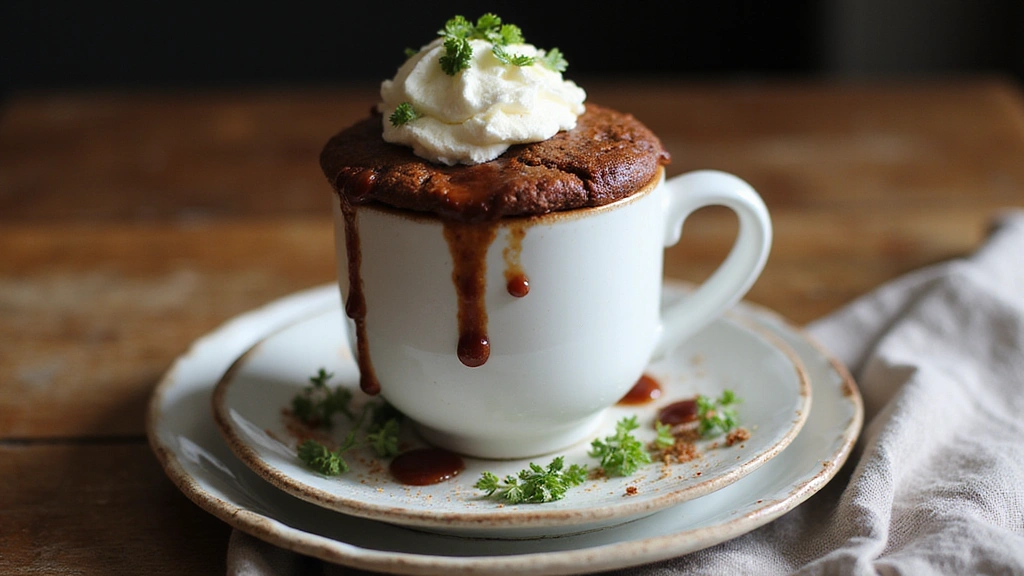
• Mini Pies: Create individual servings in ramekins for a personal touch.


Conclusion
With its bright citrus flavor and creamy texture, this Key Lime Pie is sure to become a favorite in your dessert repertoire.
Whether you're a seasoned baker or a beginner, the straightforward steps make it accessible for all.
Give it a try, and let this pie transport you to the sunny shores of Florida with every bite.