Slow Cooker Recipes: Easy Meals, Less Effort!
Family-friendly dishes for busy people — quick prep, delicious results.
Grab yours for $4There’s something undeniably comforting about the aroma of freshly baked banana nut bread wafting through the kitchen.
Its moist texture, combined with the crunch of nuts, offers a delightful contrast in every bite.
I first fell in love with this recipe during a chilly autumn afternoon when warm spices felt like a cozy embrace.
Banana nut bread is perfect for any occasion, whether it’s a family brunch or a simple afternoon snack.
Its appeal lies in its simple ingredients and straightforward preparation that promise satisfying results.
This recipe is a must-try for anyone looking to indulge in a bit of homemade comfort.
The History and Cultural Significance
• Banana Nut Bread traces its origins to the United States during the Great Depression, where it was originally created as a way to use overripe bananas.
• The dish evolved over decades as baking soda became a common household ingredient, eventually becoming the beloved version we know today.
• In American culture, this dish traditionally appears at family gatherings, symbolizing warmth and togetherness.
• While many variations exist across different regions, the authentic version maintains its characteristic moistness that sets it apart from imitations.


Recipe Overview
Nutritional Information (per serving)
Essential Equipment Guide
Mixing Bowl: A good-quality mixing bowl is crucial for evenly combining ingredients. While any large bowl can work, a non-slip base adds stability during mixing.
Loaf Pan: To achieve the classic shape, a 9×5 inch loaf pan is recommended. Non-stick pans help with easy removal, but greasing and parchment lining are great alternatives.
Cooling Rack: Proper cooling is essential to maintain the bread’s texture. A cooling rack allows air to circulate around the loaf, preventing a soggy bottom.


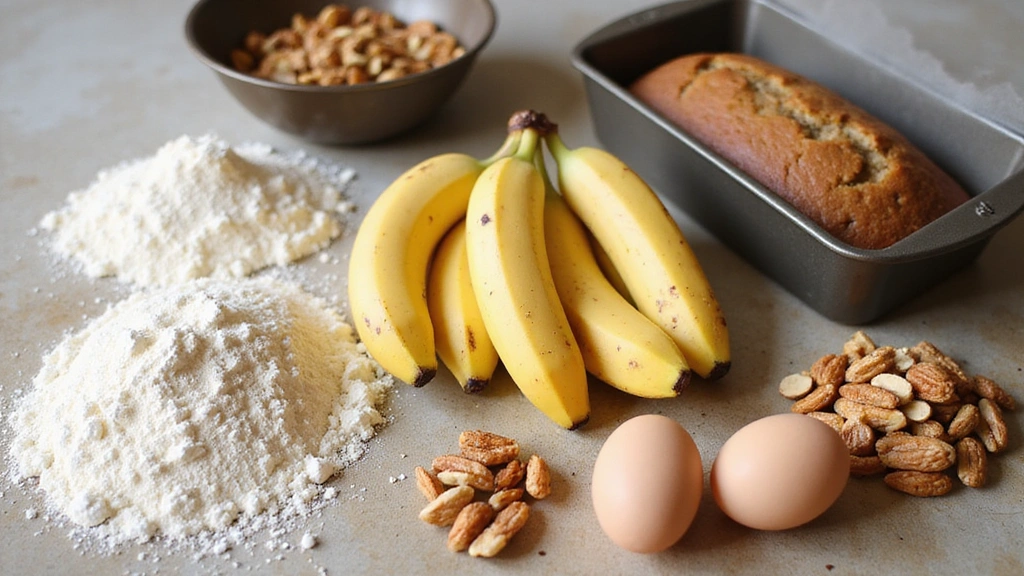
Ingredients
For the Base
|
|
| Amount | Ingredient | Notes |
|---|---|---|
| 2 cups | all-purpose flour | provides structure |
| 1 teaspoon | baking soda | leavening agent |
| 1/2 teaspoon | salt | enhances flavor |
Wet Ingredients
| Amount | Ingredient | Notes |
|---|---|---|
| 1/2 cup | unsalted butter | melted, adds moisture |
| 3/4 cup | brown sugar | adds sweetness and depth |
| 2 large | eggs | room temperature, binding agent |
| 3 medium | overripe bananas | mashed, adds flavor and moisture |
Add-ins
| Amount | Ingredient | Notes |
|---|---|---|
| 1 cup | chopped walnuts | adds crunch |
| 1 teaspoon | vanilla extract | enhances flavor |
Preparation Methods
Folding Technique: Folding is essential to gently mix the wet and dry ingredients without deflating the batter. Use a spatula to fold from the bottom, ensuring a tender crumb.
Mashing Bananas: Properly mashed bananas ensure even distribution of flavor and moisture. Use a fork or potato masher for a smooth yet slightly chunky texture.
Toasting Nuts: Toasting brings out the natural oils and intensifies the flavor of nuts. Spread them on a baking sheet and toast at 350°F for 5-10 minutes, stirring occasionally.


Step 1: Prepare Ingredients
Gather all the ingredients and equipment needed for the recipe.
Preheat the oven to 350°F (175°C).
Grease a 9x5 inch loaf pan and line it with parchment paper.
Ensure that the butter is melted and bananas are mashed.
Step 2: Mix Dry Ingredients
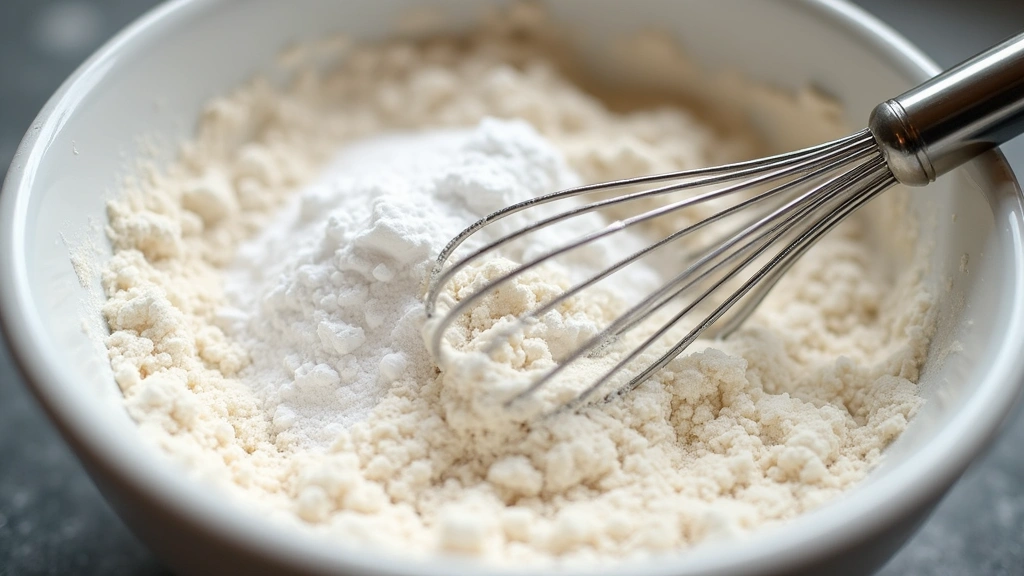
In a medium mixing bowl, combine the flour, baking soda, and salt.
Whisk together until well blended.
Ensure there are no lumps in the mixture.
Set aside for later use.
Step 3: Blend Wet Ingredients
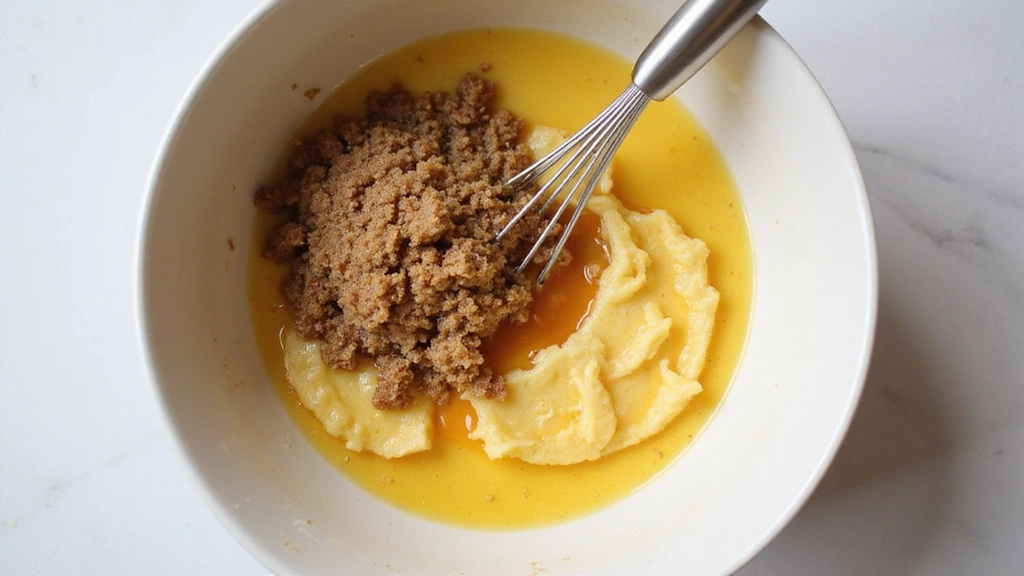
In a large bowl, whisk together the melted butter and brown sugar until smooth.
Add the eggs one at a time, mixing well after each addition.
Stir in the mashed bananas and vanilla extract.
Ensure the mixture is well combined and slightly thickened.
Step 4: Combine Wet and Dry Ingredients

Gently fold the dry ingredients into the wet mixture using a spatula.
Fold until just combined, being careful not to overmix.
The batter should be thick and slightly lumpy.
Ensure there are no visible streaks of flour.
Step 5: Add Nuts
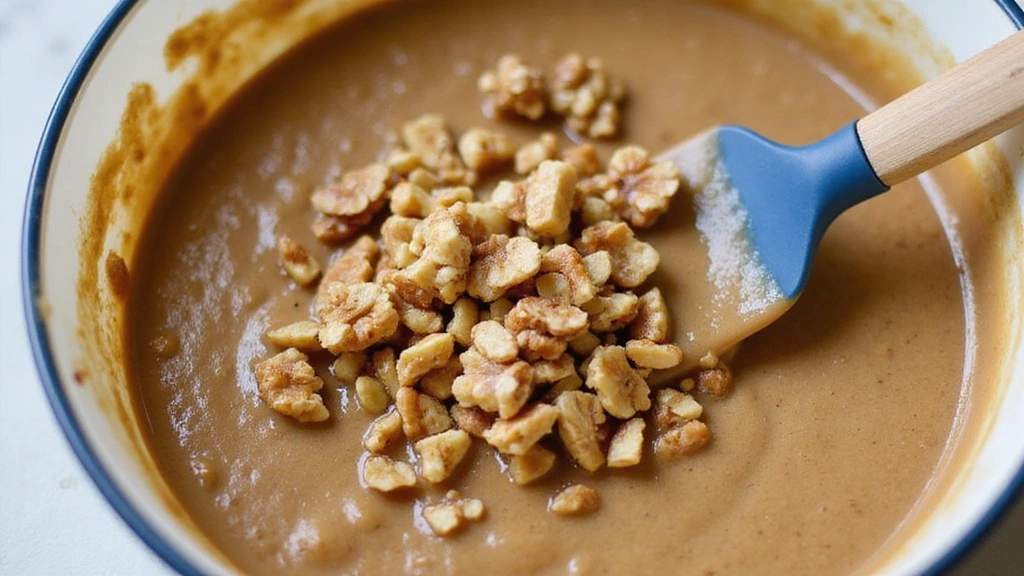
Gently fold in the chopped walnuts.
Ensure even distribution throughout the batter.
Be careful not to crush the nuts while mixing.
The batter should now be ready to pour into the pan.


Step 6: Pour Batter into Pan
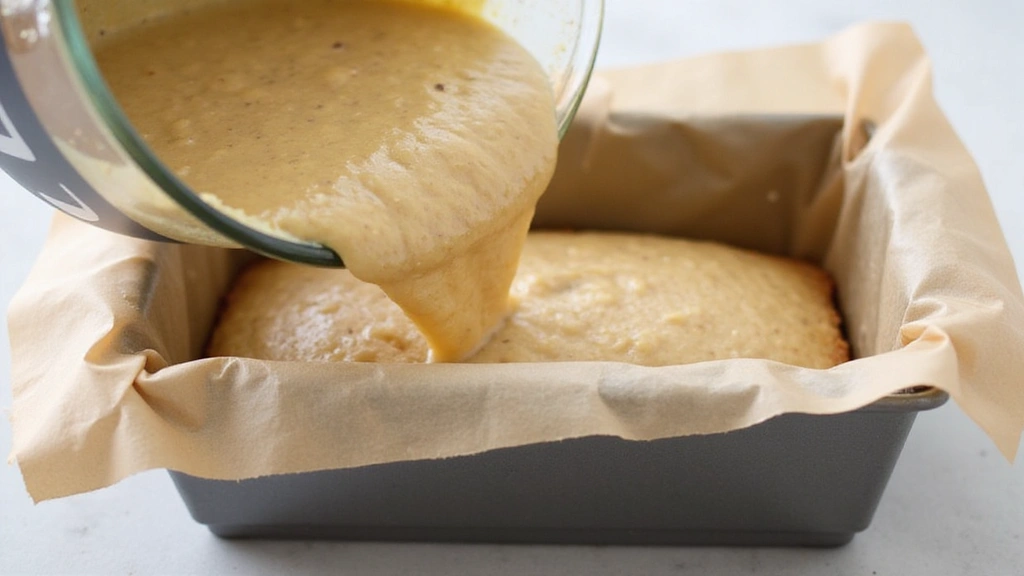
Carefully pour the batter into the prepared loaf pan.
Use a spatula to spread the batter evenly in the pan.
Smooth the top of the batter for an even bake.
Tap the pan gently on the counter to remove air bubbles.


Step 7: Bake the Bread
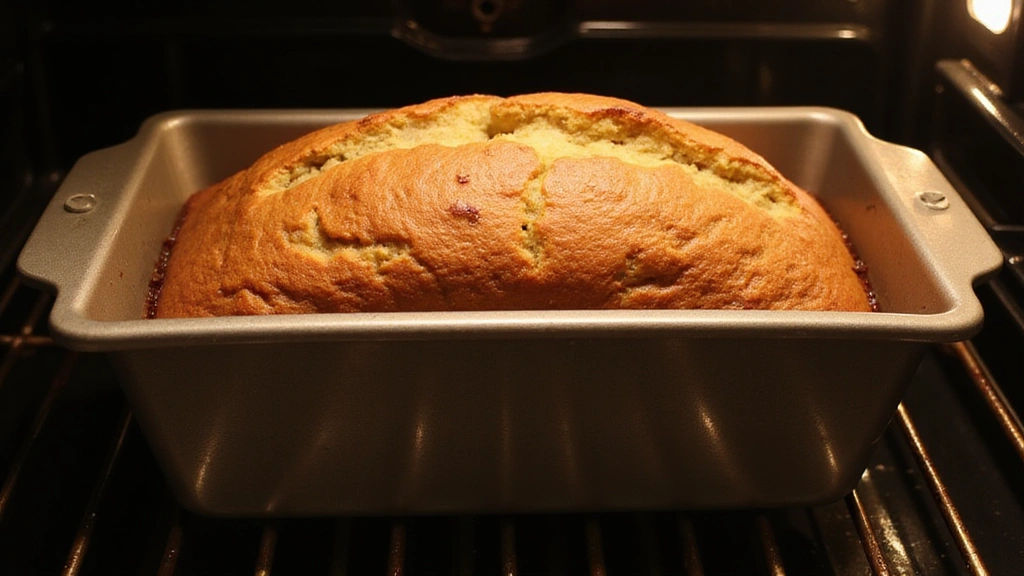
Place the loaf pan in the preheated oven.
Bake for 60 minutes or until a toothpick inserted into the center comes out clean.
Watch for a golden-brown top as an indicator of doneness.
Avoid opening the oven door too often to maintain even heat.


Step 8: Cool and Serve
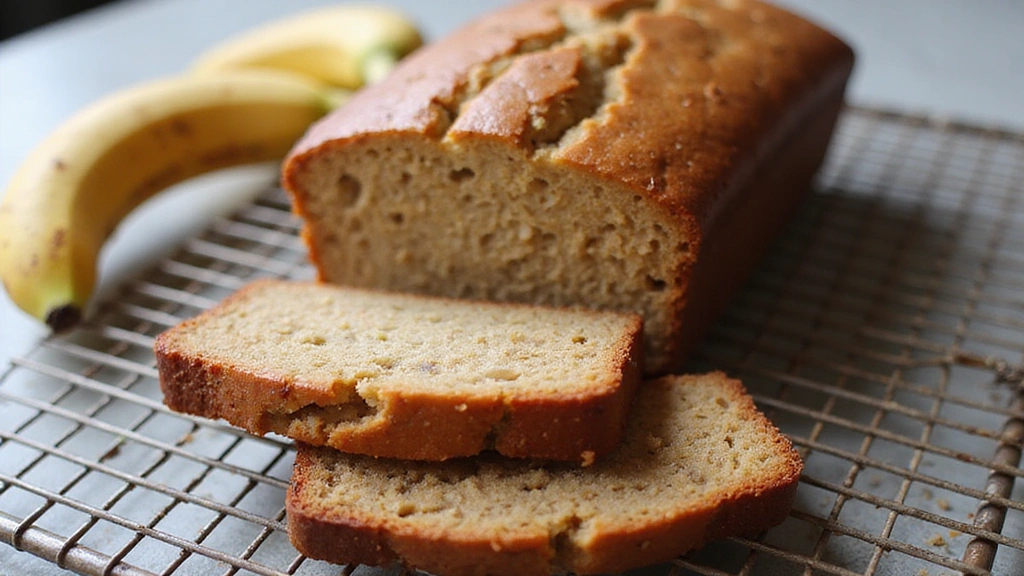
Remove the pan from the oven and let it cool on a wire rack for 10 minutes.
Carefully lift the bread out of the pan using the parchment paper.
Allow it to cool completely on the wire rack before slicing.
Serve slices warm or at room temperature.


Critical Timing and Temperature Guide
Baking Time: Bake for exactly 60 minutes at 350°F. The top should be golden brown, and a toothpick should come out clean. Avoid over-baking to prevent dryness.
Cooling Time: Allow the bread to cool in the pan for 10 minutes before transferring to a rack. This prevents the bread from becoming soggy and ensures a firm structure.
Toasting Nuts: Toast at 350°F for 5-10 minutes. Nuts should be fragrant and slightly darker. Stir occasionally to avoid burning.


Pro Tips for Banana Nut Bread
• Ingredient Selection: Use very ripe bananas with brown spots for maximum sweetness and flavor.
• Preparation Secret: Let the batter rest for 10 minutes before baking to allow the flour to absorb moisture fully.
• Temperature Management: Ensure all ingredients are at room temperature for even mixing and best results.
• Texture Enhancement: Do not overmix the batter; minimal mixing keeps the bread tender.
• Flavor Layering: Add a pinch of cinnamon or nutmeg to enhance the banana flavor profile.
• Make-Ahead Strategies: Prepare the batter and refrigerate overnight, then bake fresh in the morning.
• Restaurant-Quality Finishing Touches: Brush the top with melted butter after baking for a glossy finish.
• Equipment Optimization: Use a kitchen scale for precise measurements, especially for flour.


Troubleshooting Common Issues
• Texture Too Dense: Often caused by overmixing or using too much flour. Use a light hand when folding ingredients and measure flour accurately.
• Undercooked Center: Ensure your oven is preheated and calibrated. A longer baking time or tenting with foil can help if the top browns too quickly.
• Overly Dry Bread: Caused by over-baking or insufficient wet ingredients. Check doneness earlier and ensure bananas are ripe enough.
• Cracked Top: Normal in quick breads, but can be minimized by smoothing the top of the batter before baking.
• Lack of Banana Flavor: Use very ripe bananas and consider adding banana extract for a more pronounced flavor.
• Nuts Sinking: Toss nuts in a small amount of flour before adding to batter to help them stay suspended.


Variations and Regional Differences
• Southern Style: Often includes pecans instead of walnuts and may have a bourbon glaze for added richness.
• Hawaiian Variation: Incorporates shredded coconut and macadamia nuts, reflecting local tropical flavors.
• Chocolate Chip Version: Adds chocolate chips to the batter for a sweeter, dessert-like bread.
• Vegan Adaptation: Uses flaxseed as an egg replacer and coconut oil instead of butter, catering to plant-based diets.


Food Science Behind the Recipe
• The Role of Baking Soda: Acts as a leavening agent, reacting with acidic ingredients like bananas to create carbon dioxide bubbles that help the bread rise.
• Moisture Retention: The mashed bananas provide natural moisture, while fat from butter helps to create a tender crumb structure.
• Maillard Reaction: The browning of the bread's crust is due to the Maillard reaction, enhancing flavor and aroma.
Frequently Asked Questions
What's the most common mistake people make when preparing banana nut bread? Overmixing the batter, which can lead to a dense texture.
Can I use frozen bananas? Yes, just thaw them completely and drain any excess liquid before using.
How can I make the bread more moist? Ensure bananas are ripe, and consider adding a tablespoon of sour cream or yogurt.
What if I don't have a loaf pan? A muffin tin can be used for banana nut muffins, just reduce the baking time.
Is it okay to substitute nuts? Yes, you can use any nuts you prefer, or omit them altogether.
How long does banana nut bread keep? It stays fresh for 2-3 days at room temperature and up to a week refrigerated.
Can I freeze banana nut bread? Absolutely, wrap it tightly in plastic wrap and foil before freezing for up to 3 months.
Serving and Presentation Guide
• Traditional Presentation: Serve sliced on a wooden board with softened butter on the side.
• Brunch Buffet: Arrange slices on a tiered cake stand with fresh fruit for a colorful display.
• Gourmet Touch: Drizzle with a simple glaze made from powdered sugar and milk for added sweetness.
• Café Style: Serve with a dollop of whipped cream and a sprinkle of cinnamon for a coffeehouse vibe.


Conclusion
Now that you have this comprehensive guide, baking moist and nutty banana bread at home has never been easier.
The combination of flavors and textures promises to please even the most discerning palate.
So gather your ingredients, preheat your oven, and treat yourself and your loved ones to a slice of homemade comfort.