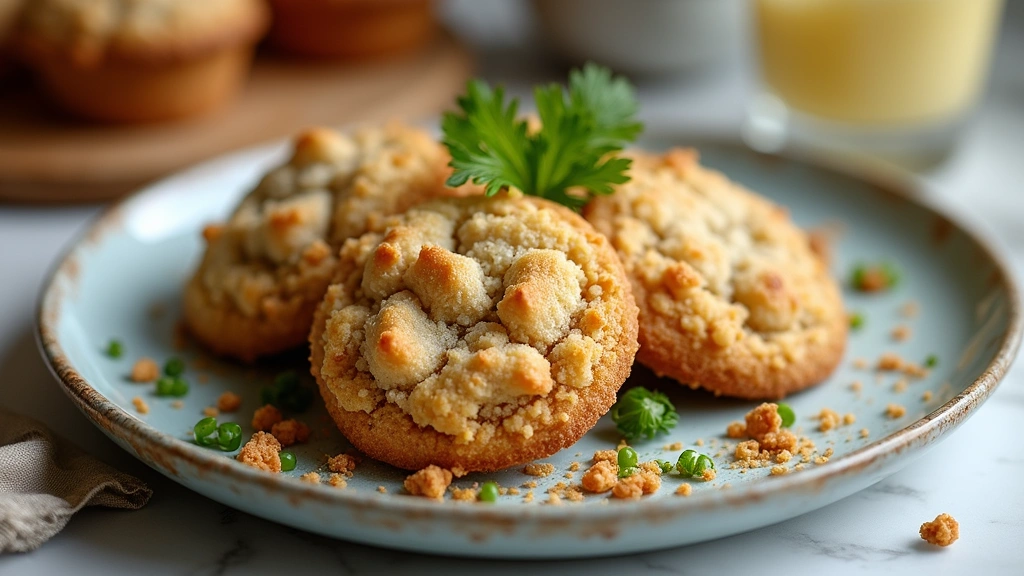

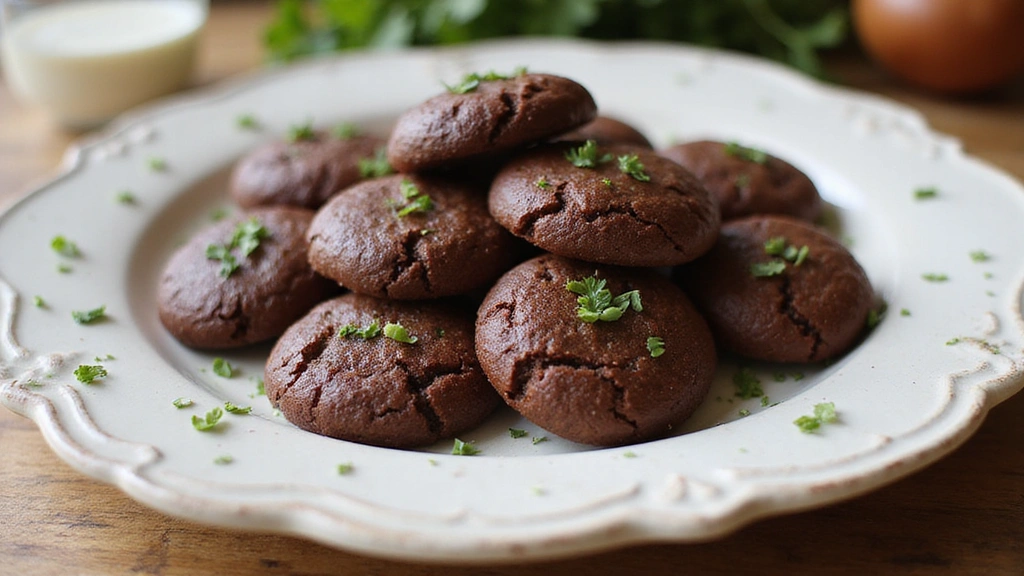
No-bake cookies are a lifesaver for those moments when you crave something sweet yet lack the time or desire to bake.
With a rich chocolatey flavor and a delightful chewy texture, these cookies are sure to become a staple in your dessert repertoire.
I first encountered this recipe during a busy holiday season when oven space was at a premium, and it quickly won me over with its simplicity and speed.
Perfect for any occasion, these no-bake cookies don’t just satisfy a sweet tooth; they also offer a nostalgic taste that transports you back to childhood kitchen adventures.
Whether you’re a seasoned cook or a kitchen novice, this recipe promises delicious results without the hassle of baking.
Enjoy them as a quick treat or a spontaneous gift to a friend—these cookies are always a hit!
The History and Cultural Significance
• No-Bake Cookies Recipe traces its origins to the United States in the 1950s, where it was originally created by home cooks seeking quick and easy desserts.
• The dish evolved over decades as ingredients like cocoa powder and oats became more common in American kitchens, eventually becoming the beloved version we know today.
• In American culture, this dish traditionally appears at potlucks and holiday gatherings, symbolizing simplicity and nostalgia.
• While many variations exist across different regions, the authentic version maintains its no-bake nature and chewy texture that sets it apart from imitations.
Recommended Products

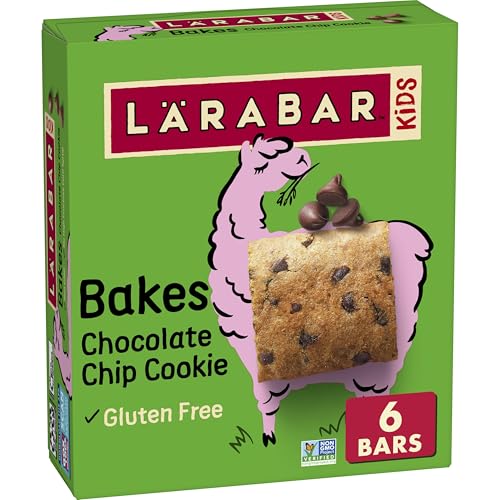
EIGHT SIMPLE INGREDIENTS: Larabar Kids Bakes are keeping it real; This delicious, chewy bar is made from buckwheat flour, honey, semisweet chocolate chips, cane sugar, coconut oil, chia seeds, water, and sea salt


Recipe Overview
Recommended Products

MAGIC IN EVERY BITE Every moment deserves Toll House cookie magic. Our chocolate chip cookie dough enables you to create an irresistible batch of 24 perfectly soft and chewy chocolate chip cookies right in your home SNAP and EBT item in eligible states

CHOCOLATE CHIP COOKIES: Delicious, mini soft baked cookies that are ready to eat; Perfect for the pantry, lunch box, or afternoon snack

Nutritional Information (per serving)
Recommended Products

Best German Silicone: We attach great importance to the health of our customers. Therefore, we use the best German WACKER silicone as the raw material in the industry. Food Grade, BPA Free, PFOA Free, Non-toxic. NOT made in Germany.

Nonstick Surface: Premium non-stick surface; most cakes, cookies and bread release without added grease; reusable substitute for disposable parchment paper

Best German Silicone: We attach great importance to the health of our customers. Therefore, we use the best German WACKER silicone as the raw material in the industry. Food Grade, BPA Free, PFOA Free, Non-toxic. NOT made in Germany.
Essential Equipment Guide
Large Saucepan: A large saucepan is crucial for combining all the ingredients evenly and ensuring they melt together smoothly. Alternatives like a non-stick pot can work, but make sure it has a heavy bottom to prevent burning.
Wooden Spoon: Using a wooden spoon helps in stirring the mixture evenly without scraping the pan’s bottom. Silicone spatulas are a good alternative, but ensure they’re heat resistant.
Cookie Sheet: A cookie sheet lined with parchment paper is essential for setting the cookies. If unavailable, wax paper or silicone baking mats can be used as substitutes, but ensure they’re placed on a flat surface for even cooling.
Recommended Products

Compact Size for Small Tasks: Designed for small-batch cooking, this 16.9oz (500ml) butter warmer holds about 2 cups of liquid and serves 1–2 people. Ideal for melting butter, heating milk, coffee, chocolate, sauces, and preparing single servings.

🥔【Professional Even Heating】Small cast iron sauce pan construction ensures uniform heat distribution, preventing scorching while perfecting BBQ sauces, butter melting pot applications, and slow-simmered stews - ideal for grill pot enthusiasts.

QUICK HEATING BUTTER WARMER: Nonstick butter melting saucepan is made from aluminum for fast, even heat to make rich butter-based sauces, melt chocolate, or warm milk

Ingredients
Recommended Products

12" EXTENDED SAFETY DESIGN: Tailored for deep stockpots and Dutch ovens! This 2-piece set of round wooden cooking spoons features a nearly 12-inch extended handle, keeping your hands safely away from hot steam and boiling splatters. Whether deep-frying or simmering large stews, these extra-long wooden mixing spoons provide the perfect protective distance. Safely tackle high-heat tasks with these reliable wood spoons for cooking, your ultimate wooden spoons for cooking

Quality material: these mixing spoons with long handle are made of quality wood material with a smooth surface and without burrs, sturdy and durable, the mixing spoon is retro, lightweight, easy to grip and heat-resistant, very suitable for non-stick pans, so you don't need to worry about scratching the surface and you can use them safely on the non-stick cookware

High quality material: The wooden coffee spoon is made of natural wood, with a smooth and solid surface. The long handle design is easy to operate, not easily deformed, and durable. The natural wood properties of long handle mini wooden mixing spoons give them natural anti sticking properties, making them particularly suitable for stirring viscous substances such as honey, syrup, or molasses, and easy to clean
For the Base
|
| Amount | Ingredient | Notes |
|---|---|---|
| 2 cups | granulated sugar | provides sweetness and structure |
| 1/2 cup | unsalted butter | adds richness and helps bind ingredients |
| 1/2 cup | milk | dissolves sugar and helps blend ingredients |
Flavor & Texture
| Amount | Ingredient | Notes |
|---|---|---|
| 1/4 cup | cocoa powder | gives a rich chocolate flavor |
| 1 teaspoon | vanilla extract | enhances overall flavor |
Mix-In
| Amount | Ingredient | Notes |
|---|---|---|
| 3 cups | quick-cooking oats | provides texture and heartiness |
| 1 cup | peanut butter | adds creaminess and enhances flavor |
Preparation Methods
Melting and Mixing: This technique involves melting the sugar, butter, and milk together until smooth. It's critical for ensuring that the sugar dissolves completely to avoid grainy cookies. Stir continuously and monitor the heat to prevent scorching.
Rapid Cooling: Once the mixture is ready, it must be dropped onto parchment paper quickly. This step is essential to ensure the cookies set correctly and maintain their shape. Work efficiently but carefully to achieve uniform sizes.
Consistency Check: Achieving the right consistency is crucial. The mixture should be thick enough to hold together but not too stiff to drop easily. Adjust by adding more oats if too thin or additional peanut butter if too thick.
Recommended Products

CLASSIC MUFFIN MIX: Chocolate chip muffins are home-baked treats that are easy to grab and go


Step 1: Prepare Ingredients

Measure all ingredients accurately before starting.
Place them within reach on your kitchen countertop.
Ensure the butter is at room temperature for easy melting.
Double-check that all oats are quick-cooking variety.
Recommended Products

One 7.8 ounce package of Duncan Hines mega cookie chocolate chunk pan cookie mix
CLASSIC COOKIE MIX: Peanut butter cookies for the family to enjoy; each 7.2-oz. bag makes twelve 2-inch cookies

One 8 oz bag of Tate's Bake Shop Soft Baked Cookies, Chocolate Chip
Step 2: Combine Sugar, Butter, and Milk

Add sugar, butter, and milk to a large saucepan.
Heat over medium until the mixture starts to melt.
Stir continuously to ensure even heating.
Look for the mixture to become smooth and homogenous.
Recommended Products

PREMIUM MATERIAL: Made of 100% food-grade silicone, these non-stick baking mats ensure safe and healthy cooking without any BPA

Easy Cleanup: The surface helps reduce baked-on residue, and the mats can go in the dishwasher once cool for convenient cleanup between batches

All in One Kit: Master all baking projects with baking mats silicone for baking sheets kit: 2pcs macaron silicone baking mats (16.54"x 11.61"), 1pcs macaron mat (11.61"x8.5"), 1PCS baking mat (11.61"x8.5"), 1pcs 8.5" round silicone mat, and 1PCS square liner (8.5"x8.5"). Sized for half-sheet, quarter-sheet and round/square pans

Step 3: Incorporate Cocoa Powder
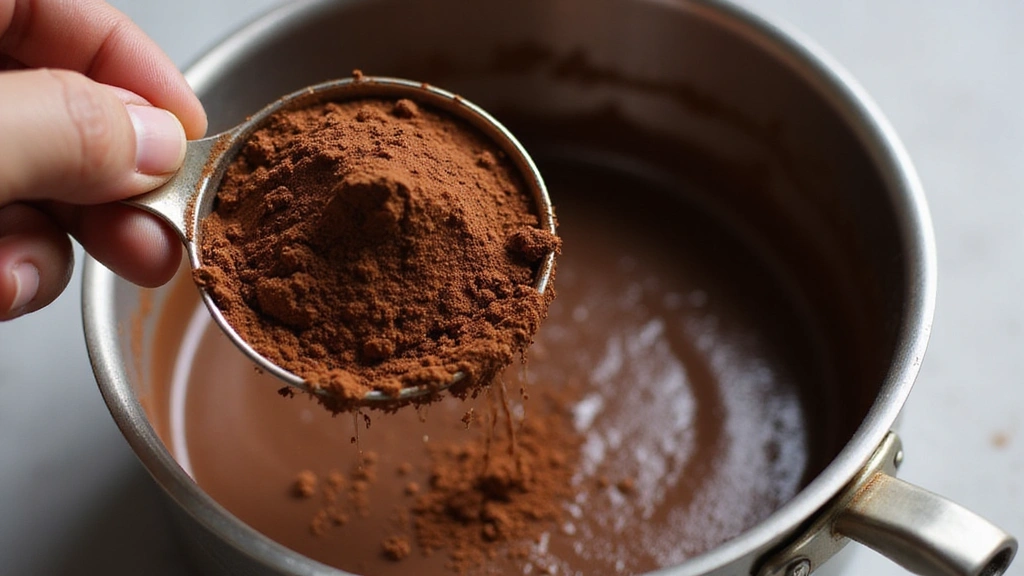
Sift cocoa powder into the saucepan.
Mix well until the cocoa is fully dissolved.
Ensure there are no lumps for a smooth texture.
The mixture should take on a rich, dark color.
Recommended Products

Compact Size: The enamel milk pan measures approx 5.9" diameter x 3.1" height x 6.1" handle length with the maximum capacity of 1.1L/37oz, perfect for your daily little cooking needs.

Premium 18/8 Stainless Steel – Rust-Proof & One-Piece Easy Clean: This small saucepan is crafted from high-quality 18/8 stainless steel, resisting rust and corrosion for years of use. The one-piece formed body has no hidden seams or crevices, making it incredibly easy to hand wash or place in the dishwasher. As a durable stainless steel saucepan, it comes with a tiny pot with lid that traps heat and moisture for better cooking results.

▶GREAT CAST IRON BASTING POT AND MOP SET◀ Cast Iron Melting Pot with Basting Mop Brush is perfect for basting, mixing, and melting sauces and food.

Step 4: Bring to a Boil
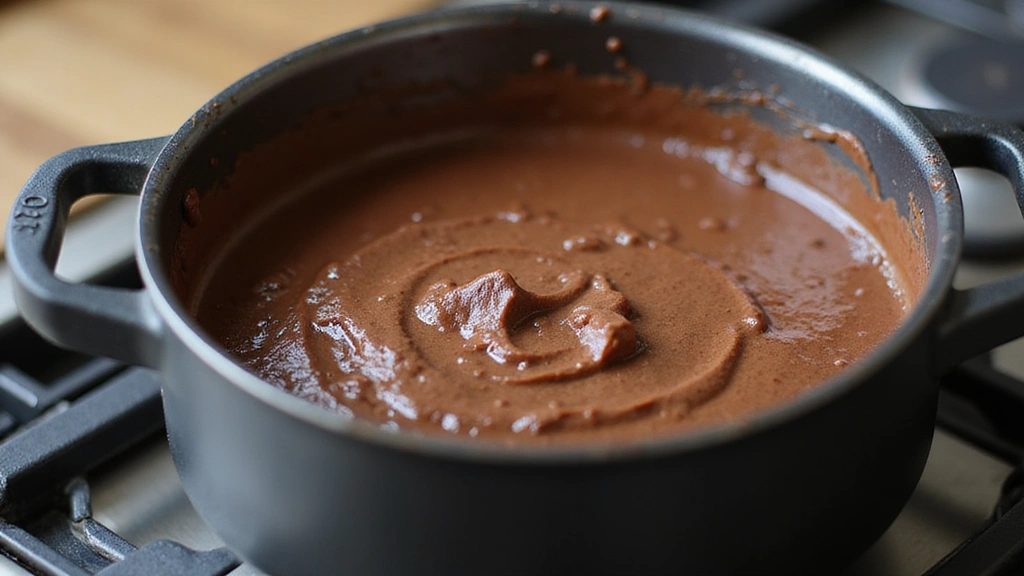
Increase the heat to medium-high.
Bring the mixture to a rolling boil.
Boil for exactly one minute to achieve the right consistency.
Avoid boiling longer to prevent a grainy texture.
Recommended Products

Made of solid beech wood

HIGH-QUALITY MATERIALS - Our wooden spoon for cooking is made of Kemu, with a smooth surface, no burrs, strong and durable, lightweight but strong, and can be used for a long time. Will not scratch the surface and can be used safely on non-stick cookware
Wooden construction - Provides lasting durability and comfort


Step 5: Add Vanilla and Peanut Butter

Remove the saucepan from heat.
Quickly stir in vanilla extract and peanut butter.
Mix until the peanut butter is fully melted and incorporated.
The mixture should be creamy and uniform.


Step 6: Fold in Oats

Add the oats to the mixture.
Stir thoroughly to ensure even coating.
Check that the oats are fully integrated into the mixture.
The consistency should be thick and sticky.


Step 7: Drop Cookies onto Parchment

Using a spoon, drop spoonfuls of the mixture onto parchment paper.
Space them evenly to prevent sticking together.
Work quickly as the mixture will start to set.
Aim for uniform sizes for even setting.


Step 8: Allow to Set
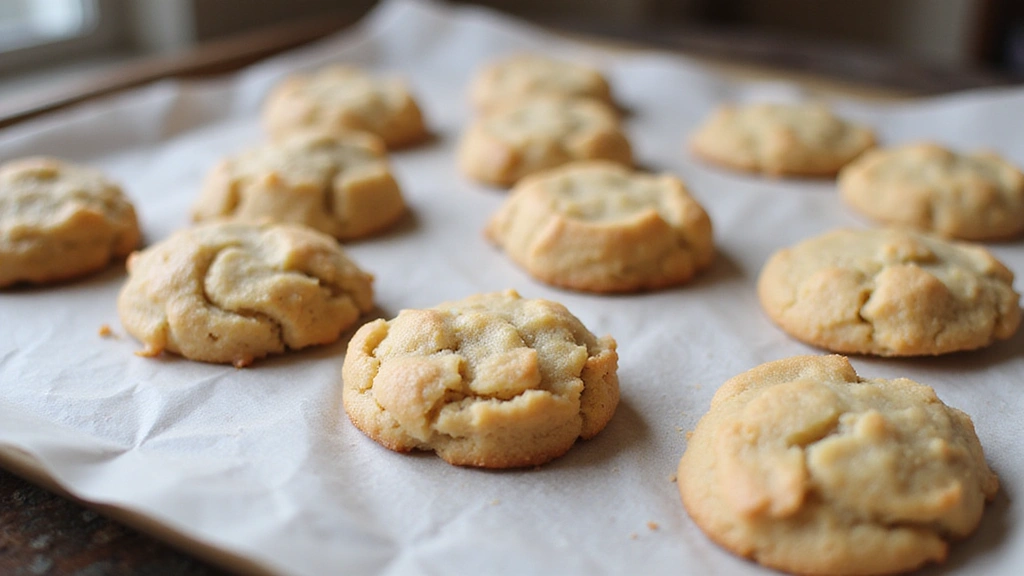
Let the cookies cool at room temperature.
Wait for them to firm up completely before serving.
The cookies should be firm yet slightly chewy.
Store in an airtight container once set.


Critical Timing and Temperature Guide
Boiling the Mixture: Boil the mixture for exactly one minute. Visual indicators include a rolling boil with large bubbles. Avoid boiling too long to prevent a grainy texture.
Cooling and Setting: Allow cookies to cool at room temperature for at least 30 minutes. Visual indicators are firm edges with slightly chewy centers. Avoid refrigerating to set, as it can make the cookies too hard.
Storage Conditions: Store cookies in a cool, dry place. Use an airtight container to maintain freshness. Avoid storing in humid environments to prevent them from becoming sticky.


Pro Tips for No-Bake Cookies Recipe
• Ingredient Selection: Use high-quality cocoa powder for a richer chocolate flavor, and prefer creamy peanut butter for a smooth texture.
• Preparation Secret: A small pinch of salt can enhance the chocolate flavor and balance the sweetness.
• Temperature Management: Ensure the saucepan is fully heated before adding sugar to prevent uneven melting.
• Texture Enhancement: Stir the mixture continuously during boiling to prevent sugar crystallization and maintain smoothness.
• Flavor Layering: Adding a dash of cinnamon or espresso powder can deepen the chocolate flavor, creating a more complex profile.
• Make-Ahead Strategies: The mixture can be prepared up to the point of adding oats, then stored in the fridge and gently reheated before completing the recipe.
• Restaurant-Quality Finishing Touches: Drizzle with melted chocolate or sprinkle with sea salt before setting for an elevated presentation.
• Equipment Optimization: Use a silicone spatula for stirring to avoid scratching non-stick surfaces and ensure thorough mixing.


Troubleshooting Common Issues
• Cookies Too Soft: This can be caused by not boiling the mixture long enough. Recognize it by cookies not setting after cooling. Fix by reheating the mixture and boiling for an additional 30 seconds.
• Grainy Texture: Caused by sugar not dissolving completely. Look for undissolved sugar crystals in the mixture. Remedy by ensuring a full boil and constant stirring during boiling.
• Flavors Unbalanced: Often due to imprecise measurements of cocoa or vanilla. Identify by a dominant single flavor. Correct by adjusting the cocoa and vanilla proportions in future batches.
• Setting Too Hard: Occurs from overboiling the mixture. Noticeable when cookies are rock-hard. Fix by reducing boiling time next attempt to exactly one minute.
• Mixture Too Runny: Usually from too little oats or too much liquid. Recognize by cookies spreading too much while setting. Solve by adding more oats incrementally until the desired consistency is achieved.
Variations and Regional Differences
• Southern Style: Uses pecans instead of oats for a nutty twist, adding depth and crunch, reflecting Southern culinary traditions.
• European Variation: Incorporates dark chocolate chunks and uses hazelnuts, offering a richer, more luxurious version inspired by European chocolate confections.
• Gluten-Free Adaptation: Utilizes gluten-free oats and almond butter, maintaining the classic flavor while catering to dietary restrictions.
• Vegan Version: Replaces butter with coconut oil and milk with almond milk, keeping the recipe accessible for vegan diets without sacrificing flavor.
Food Science Behind the Recipe
• Sugar Crystallization: Understanding sugar's role in achieving the right texture helps avoid graininess. Proper boiling ensures sugar dissolves completely, creating a smooth, cohesive mixture.
• Lipid Emulsification: The blending of peanut butter and butter creates a stable emulsion, holding the mixture together. Emulsification is crucial for the cookie's structure and mouthfeel.
• Protein Denaturation: Heat causes proteins in milk to denature, impacting the mixture's ability to bind. Controlled heat application ensures optimal consistency and binding without curdling.


Frequently Asked Questions
What's the most common mistake people make when preparing no-bake cookies? Over or under-boiling the mixture is a common issue, affecting the cookies' final texture and consistency.
Can I use old-fashioned oats instead of quick-cooking oats? Quick-cooking oats are preferred for their finer texture, but old-fashioned oats can be used if you don't mind a chewier texture.
How can I make these cookies less sweet? Reduce the sugar by 1/4 cup and add a pinch of salt to balance the flavors without affecting the setting process.
Is there a way to make these cookies dairy-free? Yes, substitute unsalted butter with coconut oil and milk with almond or soy milk for a dairy-free version.
How do I prevent the cookies from sticking to the parchment paper? Ensure the mixture cools slightly before dropping onto the paper, and use high-quality, non-stick parchment.
How long do these cookies last? Stored in an airtight container, they can last up to two weeks at room temperature.
Can I freeze no-bake cookies? Yes, they freeze well and can be stored for up to three months. Thaw at room temperature before serving.
Serving and Presentation Guide
• Traditional Presentation: Serve the cookies on a rustic wooden platter to emphasize their homey, nostalgic appeal.
• Elegant Display: Arrange cookies in a tiered dessert stand, drizzled with a light chocolate glaze for a sophisticated touch.
• Casual Setting: Present in a basket lined with a colorful napkin for a picnic or casual gathering, highlighting their ease and accessibility.
• Gift Presentation: Wrap individually in cellophane bags tied with ribbon, making them a delightful and personal gift option.

Conclusion
No-bake cookies offer a quick and easy way to indulge in a chocolatey treat without the hassle of baking.
Their rich flavor and chewy texture make them a favorite for all ages, perfect for any occasion.
Try this recipe today and enjoy the satisfaction of creating a delicious dessert in no time.
Share them with friends and family, and watch as these cookies become a beloved staple in your kitchen.